Preparing hives for Spring
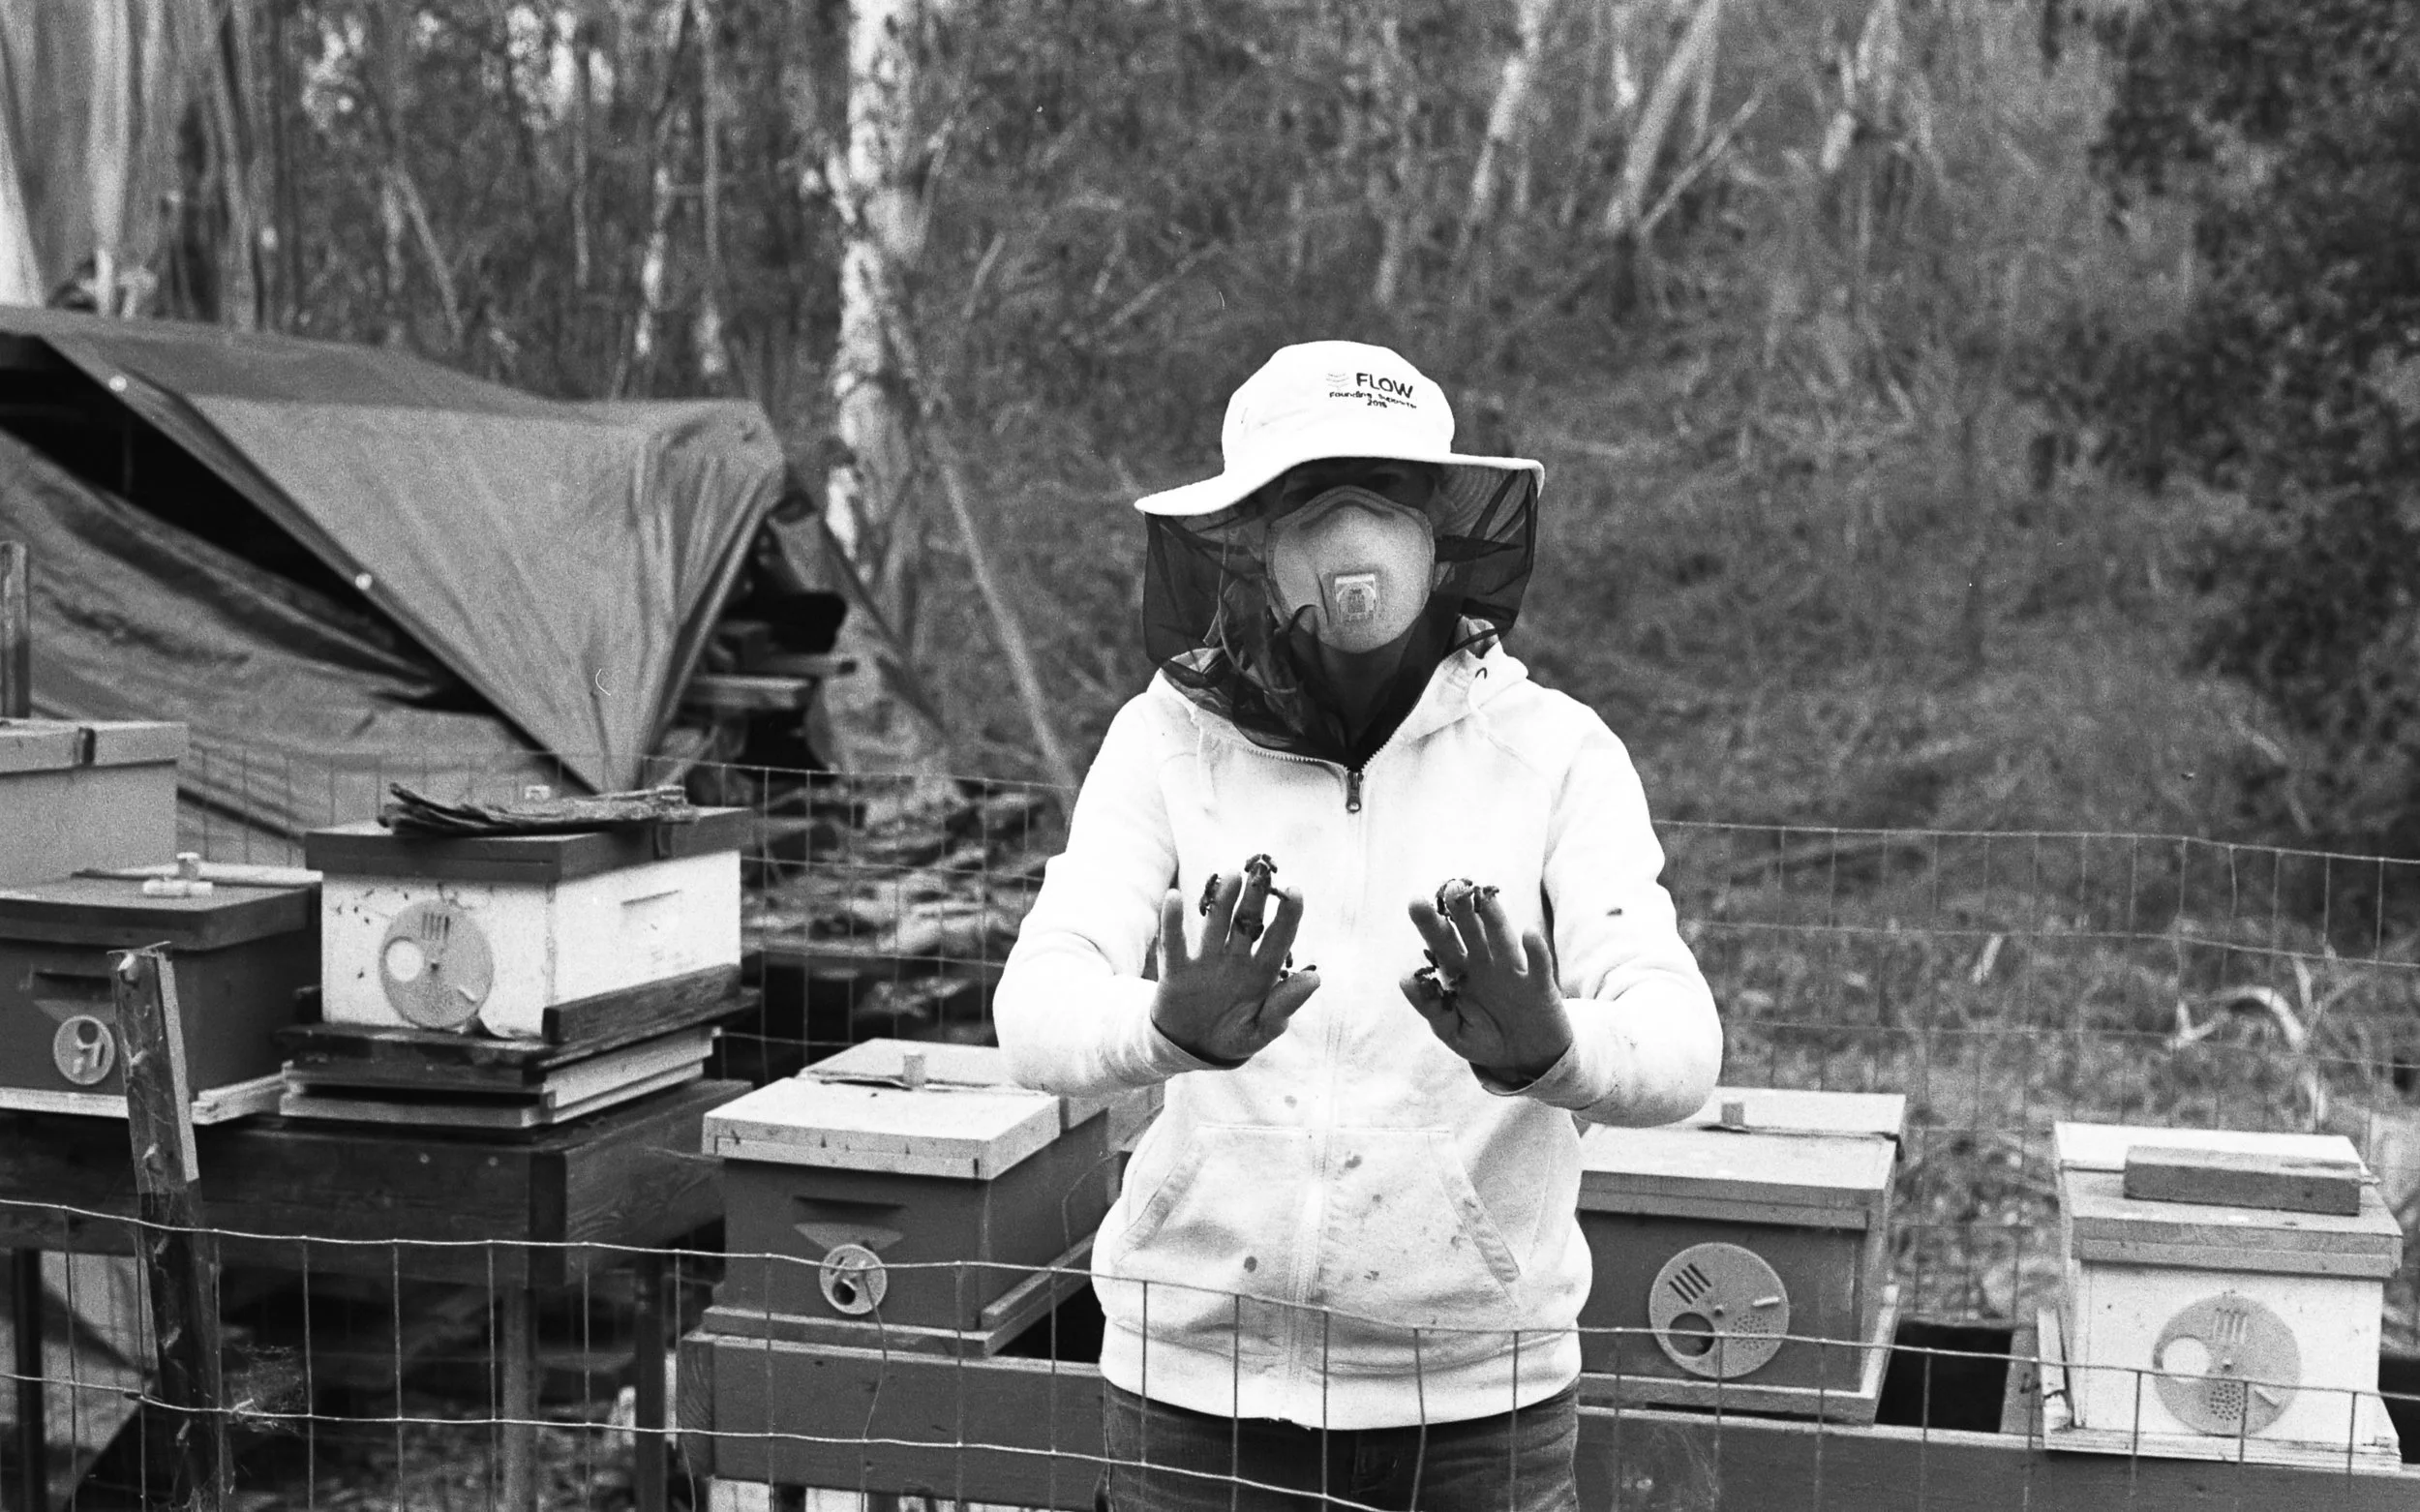
I've been inspecting hives in this gorgeous weather and wanted to share a few observations and methods for spring. 

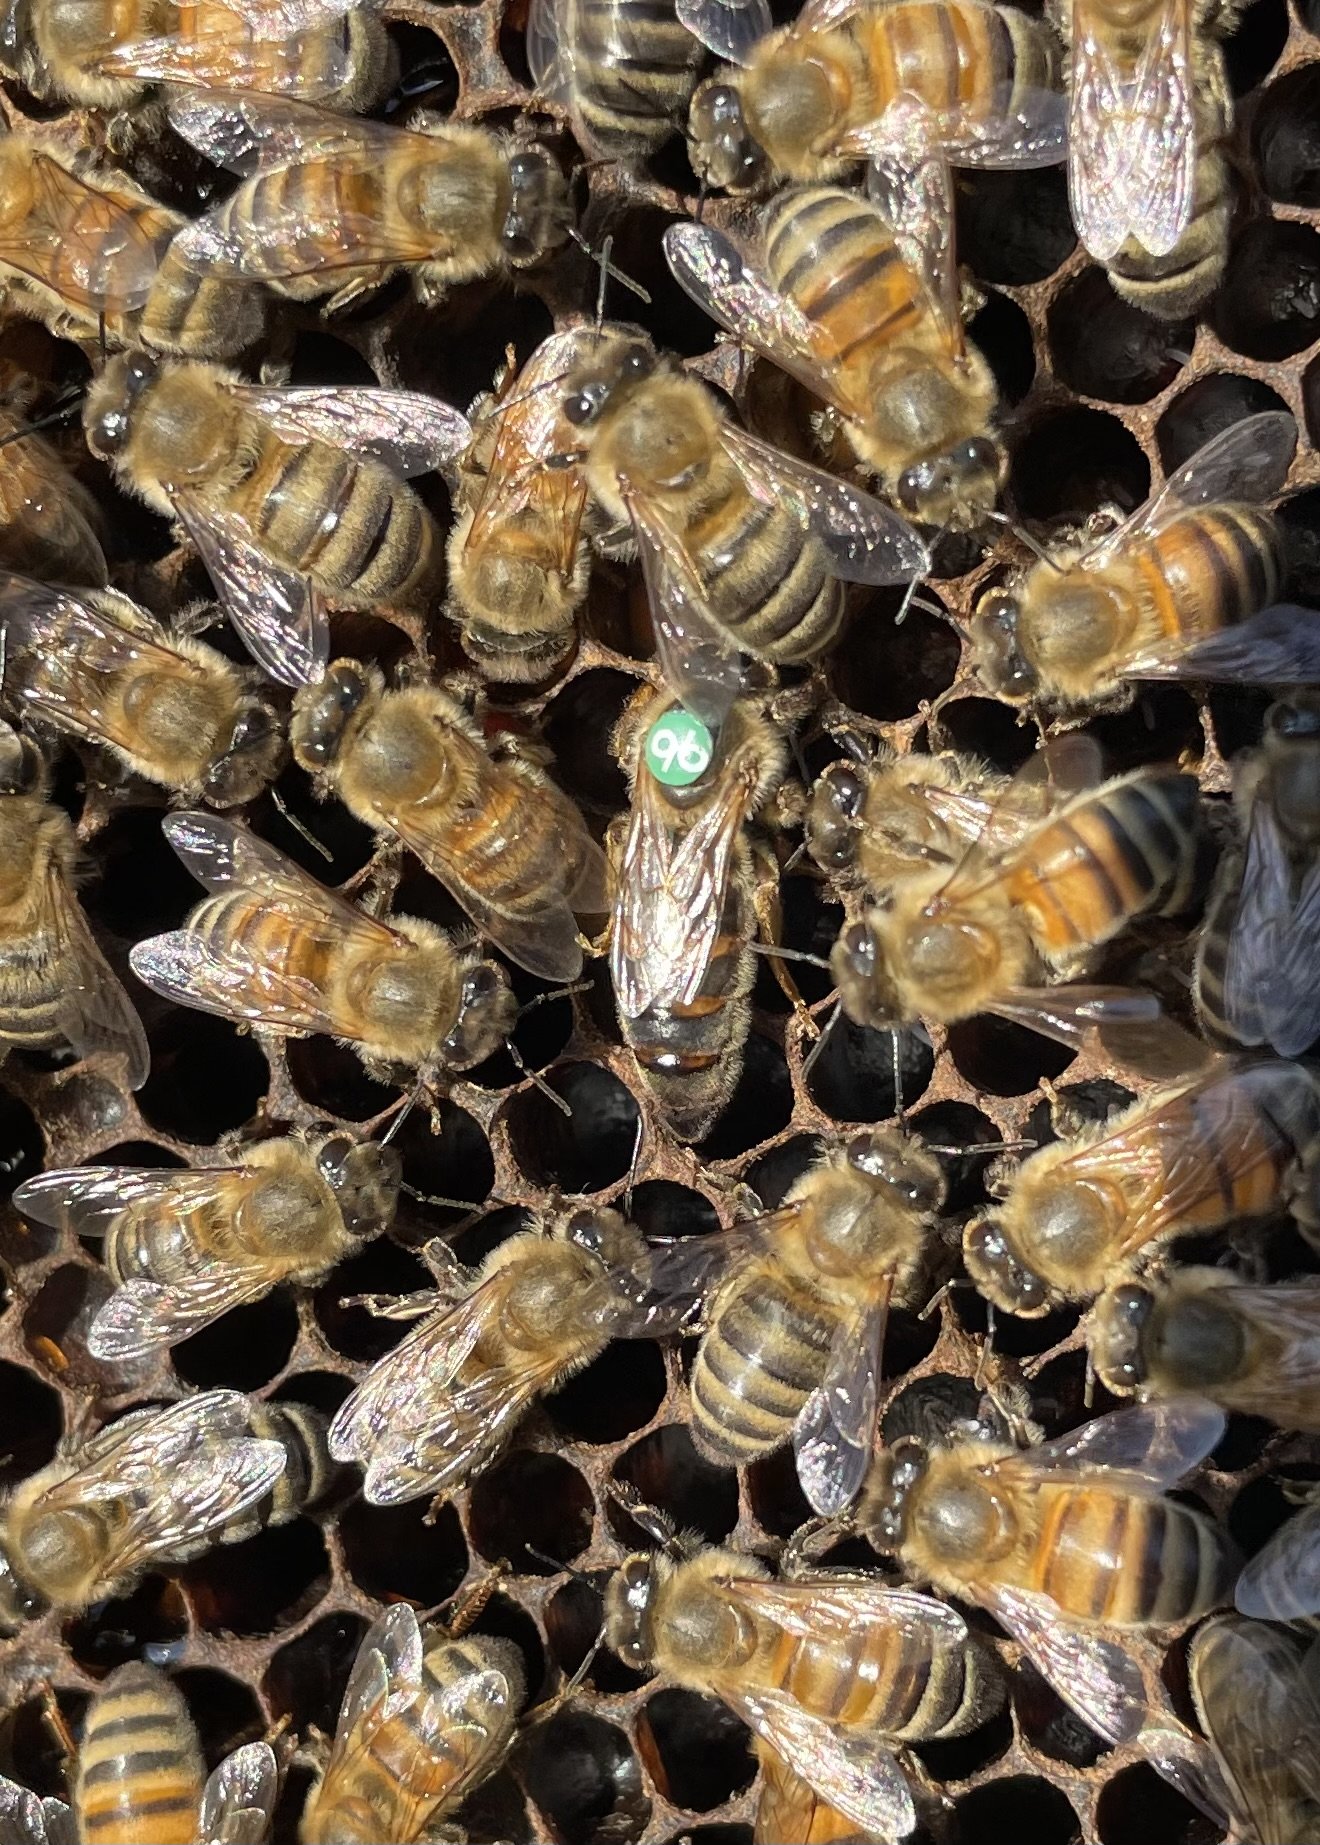
Photo of Jennifer by caley morrison

Plums have started to bloom in most locations, providing a good source of early nectar. Eucalyptus has been blooming for a while now in most locations, also a great source of nectar. Willows and acacias are blooming, a good source of pollen. Maples and other hardwoods will soon be blooming, along with early fruit trees such as apricots, cherries and almonds. 


Bee gathering acacia pollen

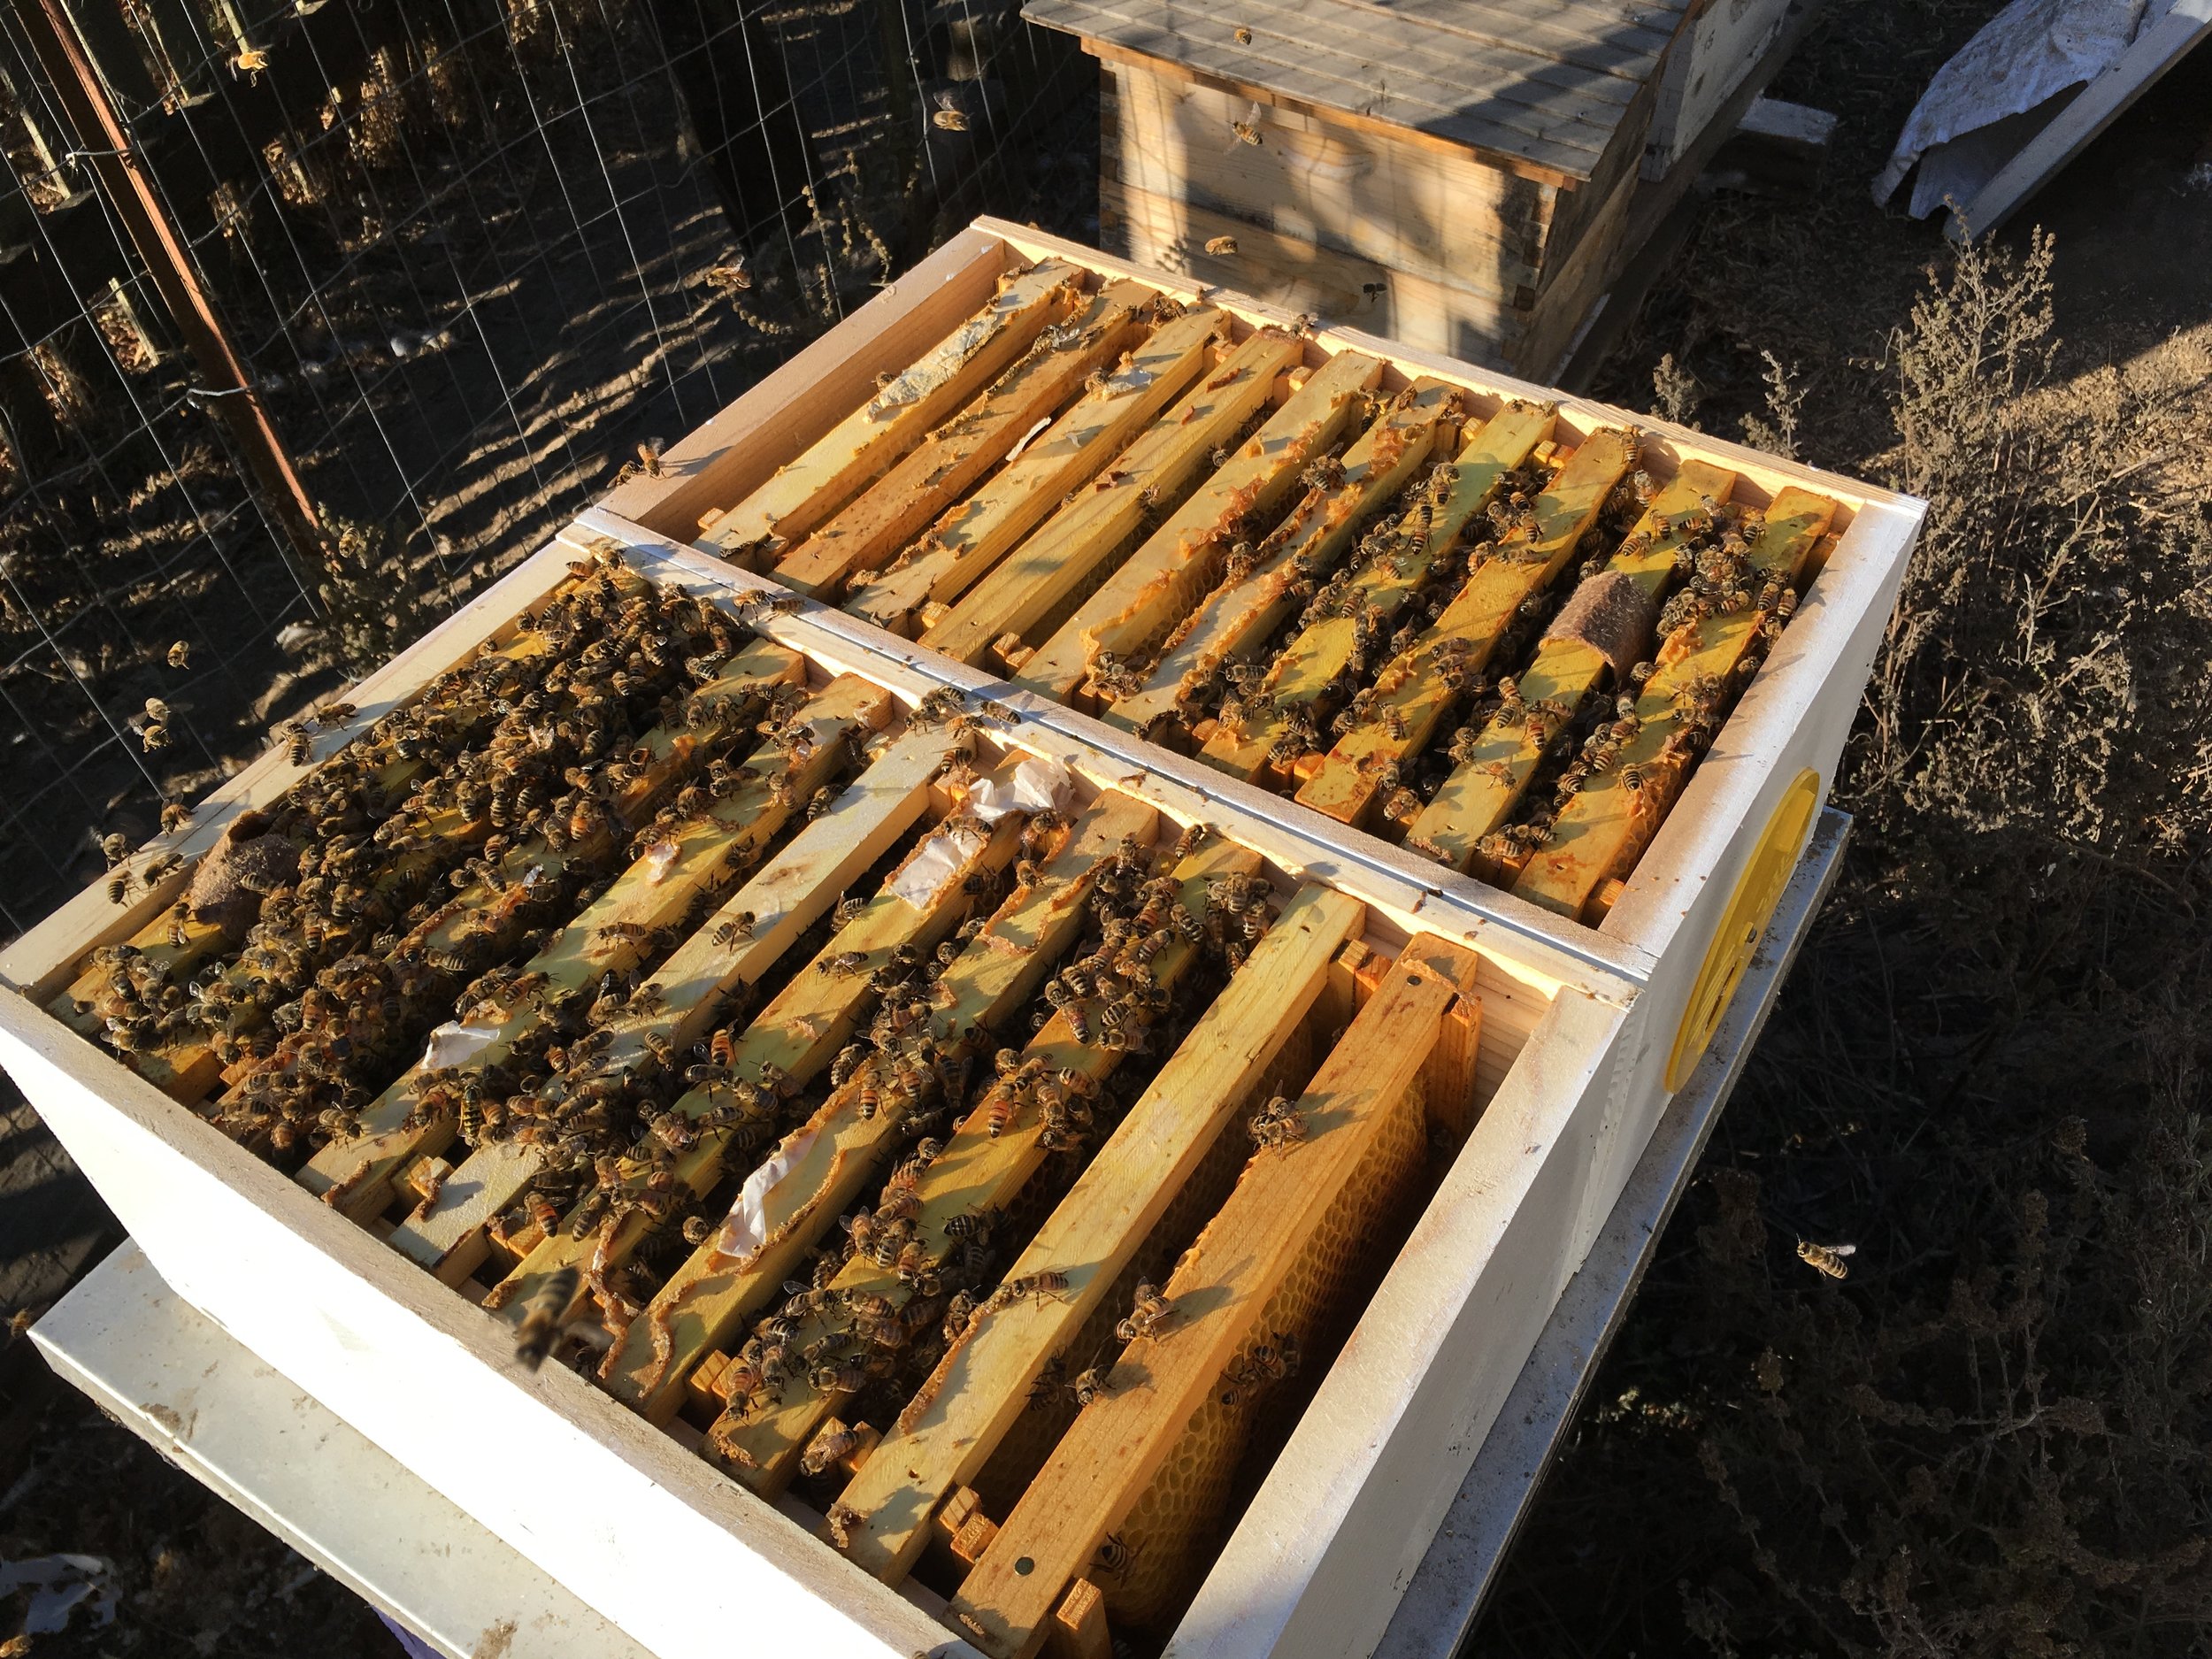
Most of the hives that were in good shape going into winter are starting to increase brood production and need room. By good shape I mean they had one or more full boxes with drawn comb and resources, were treated for mites in October/November.  To those hives I've been adding boxes of drawn comb to the bottom of the hive stack- this method is called Nadiring, (opposite of Supering) and allows the bees to move down as the hive grows. This method is best for nights when the temperatures are still on the cool side, since the bees won't have to move up to stay warm and can still access resources around them. Nadiring is also a great way to add new boxes of undrawn comb to your hives. You should only add new, undrawn comb during a nectar flow, but now is a great time and will give you a leg up during the swarm season. 

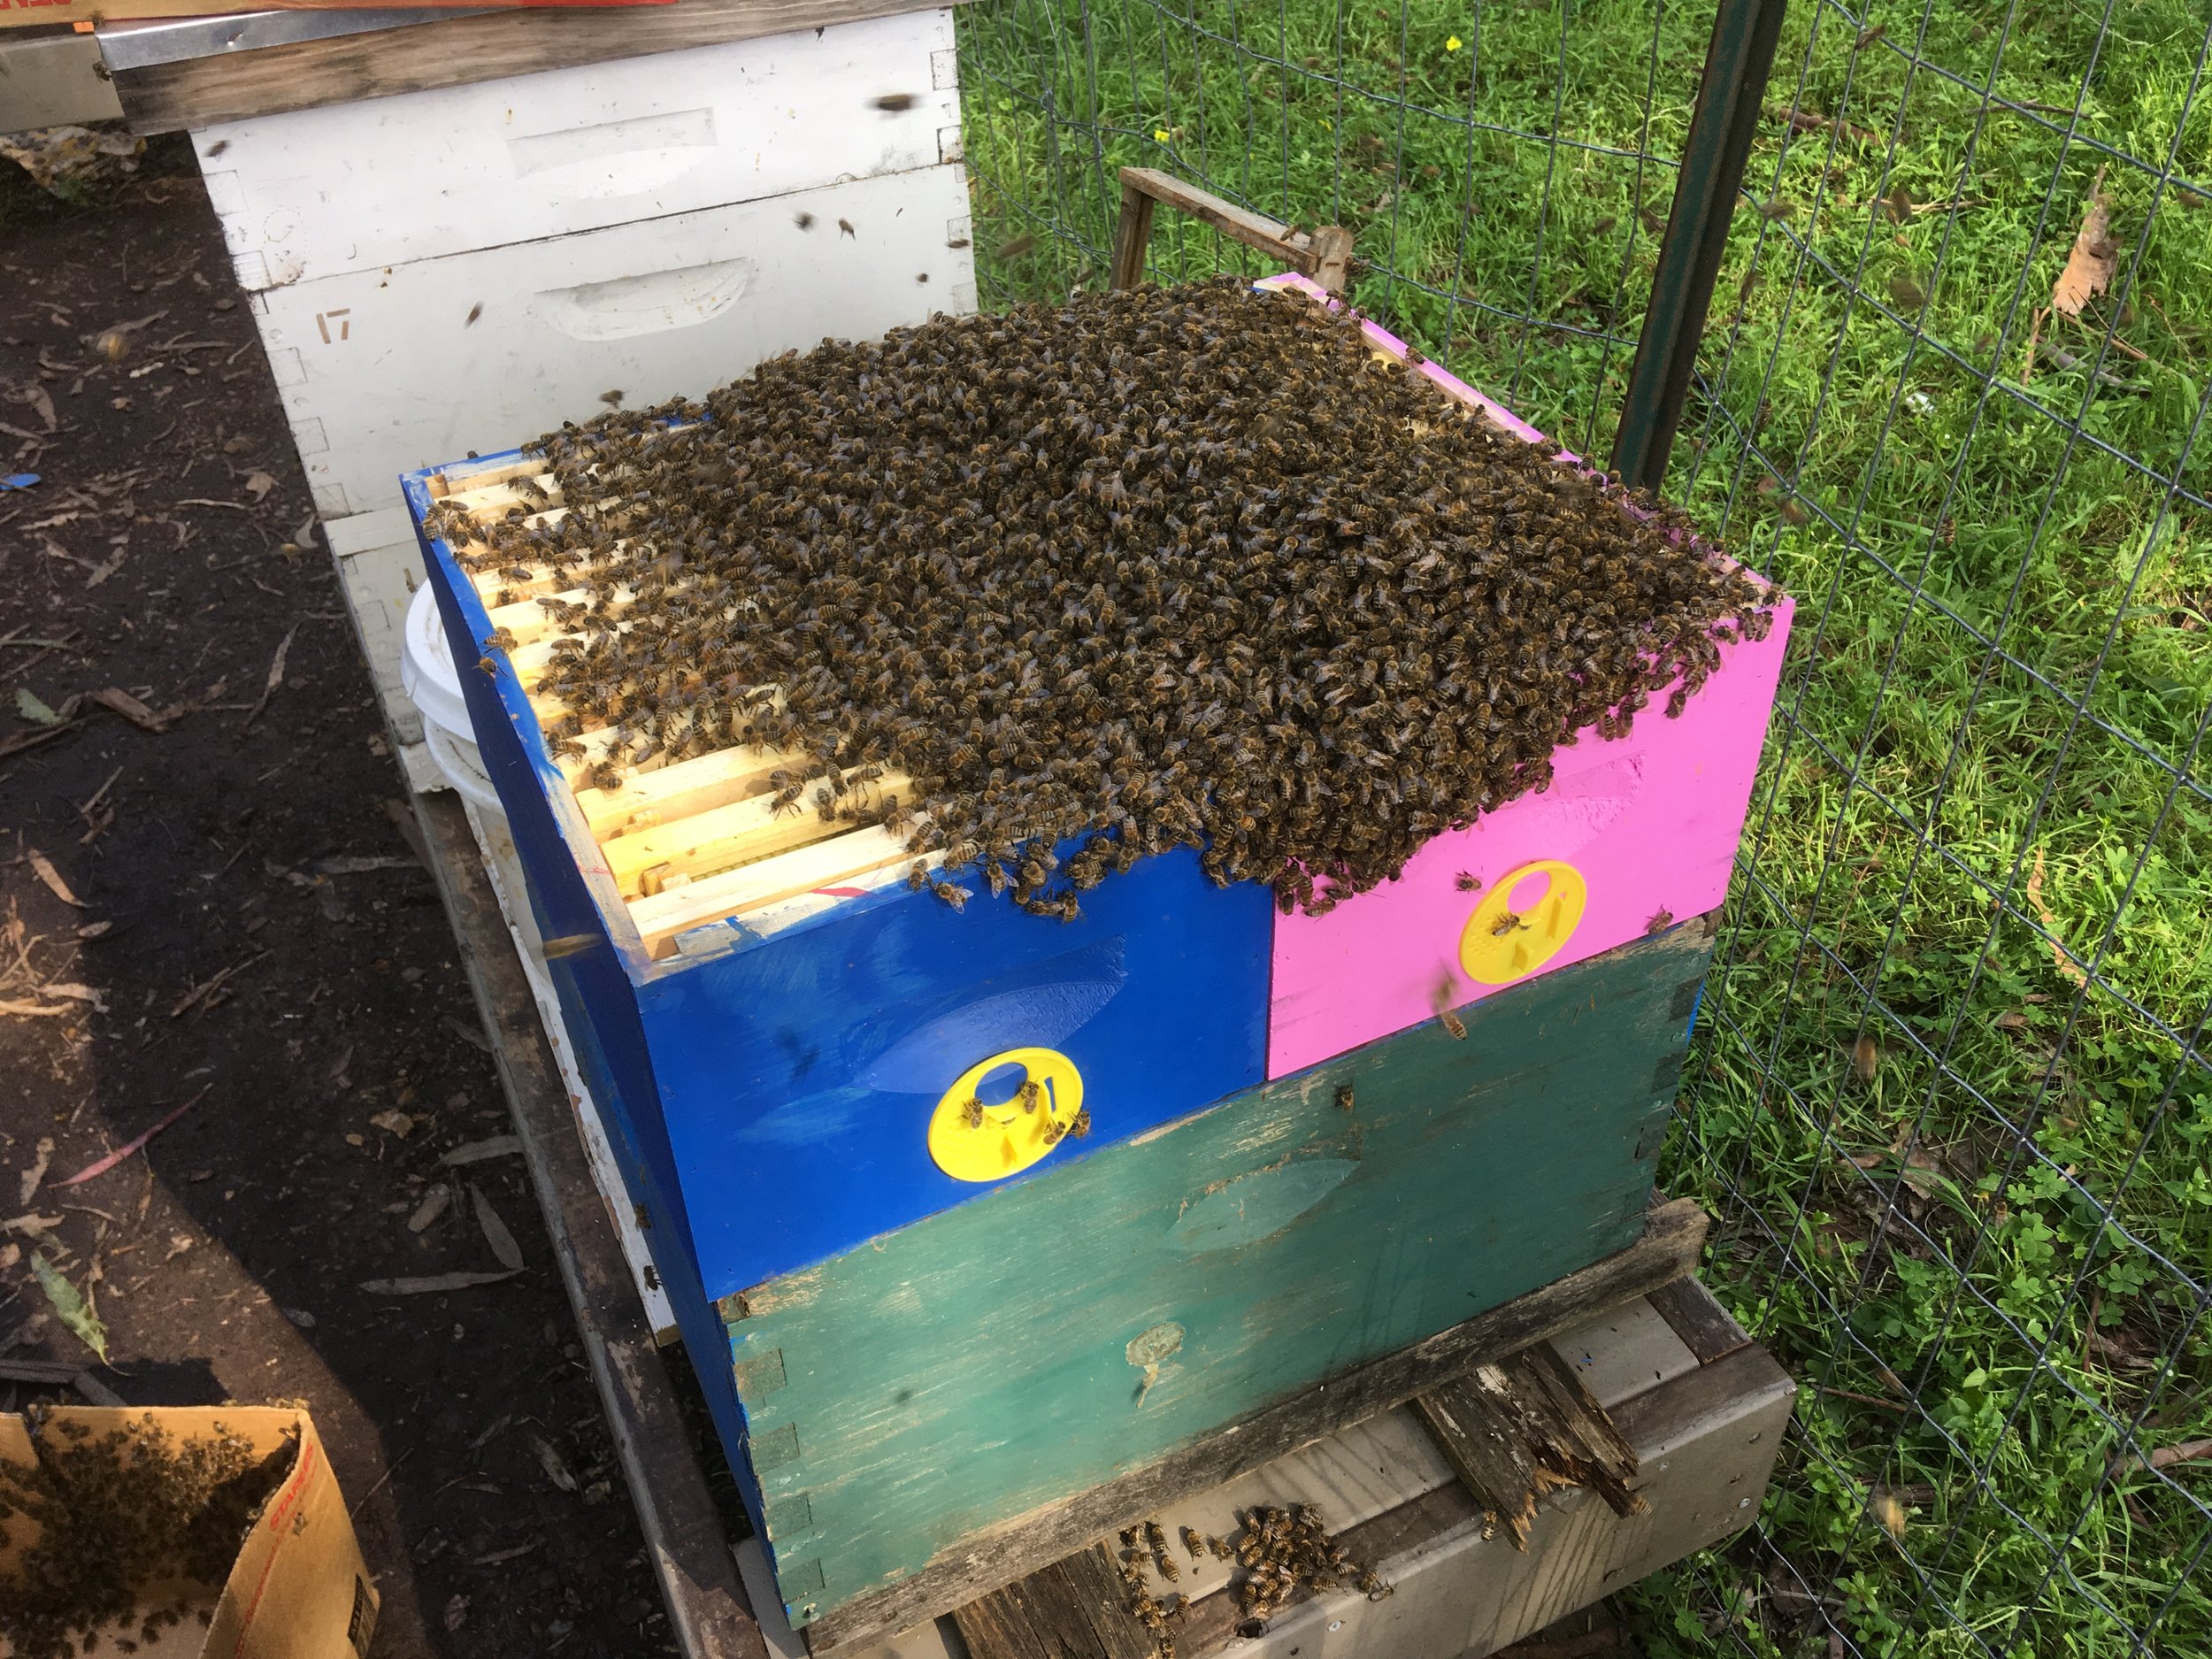
I'm seeing a few hives with swarm cells, but I don't yet consider it to be swarm season. These are hives that overwintered in a single brood box and are growing, so they are really crowded. Why don't I consider that an indication of swarming? Because a swarm from boxes this small would risk both the parent and the daughter colony, because neither are big enough to fare well this time of year. Hives exhibiting this behaviour need to be given more comb to grow, and this will usually get them to relax and stay put for a while longer. 

Signs of good nutrition, with brood surrounded by fresh pollen and nectar

Some of the hives have needed resources. If you open a hive and there is no fresh nectar and pollen in an arch surrounding the brood, they are suffering from starvation and malnourishment. It's getting warm enough in the daytime to feed syrup again. I use a mason jar with holes poked in it over the hole in the inner cover for fast delivery of food. 

my favorite way to feed syrup

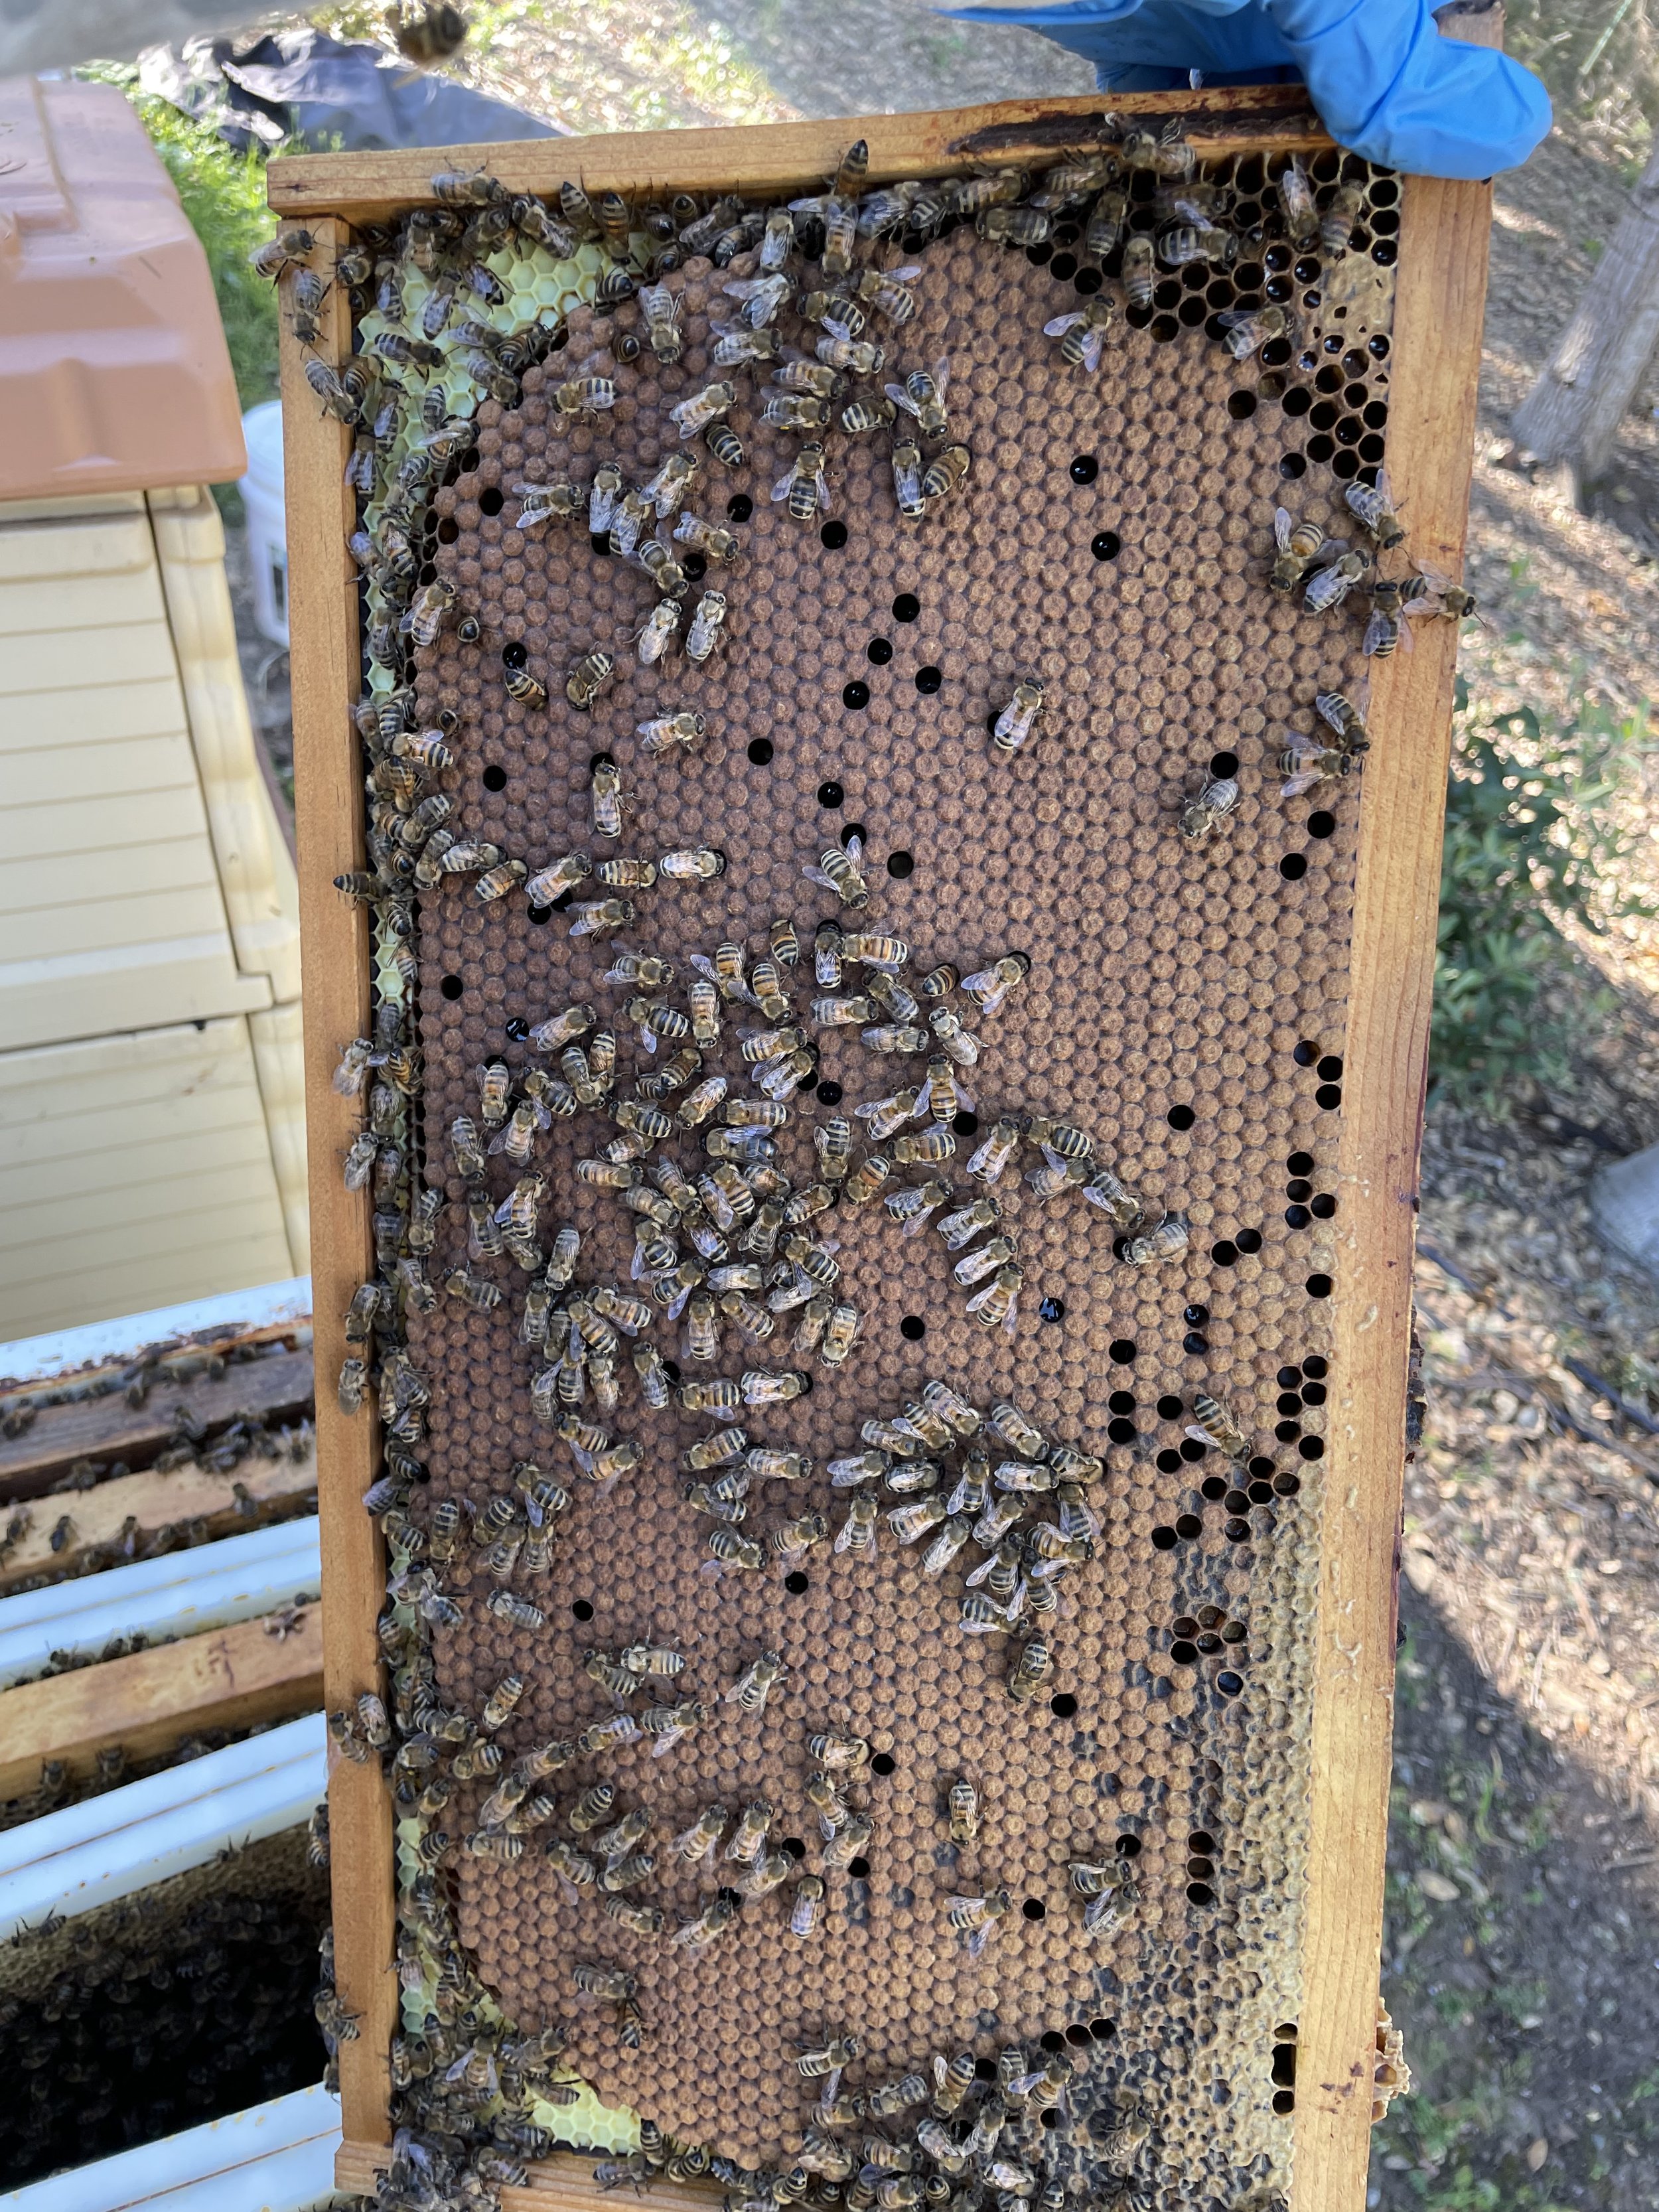
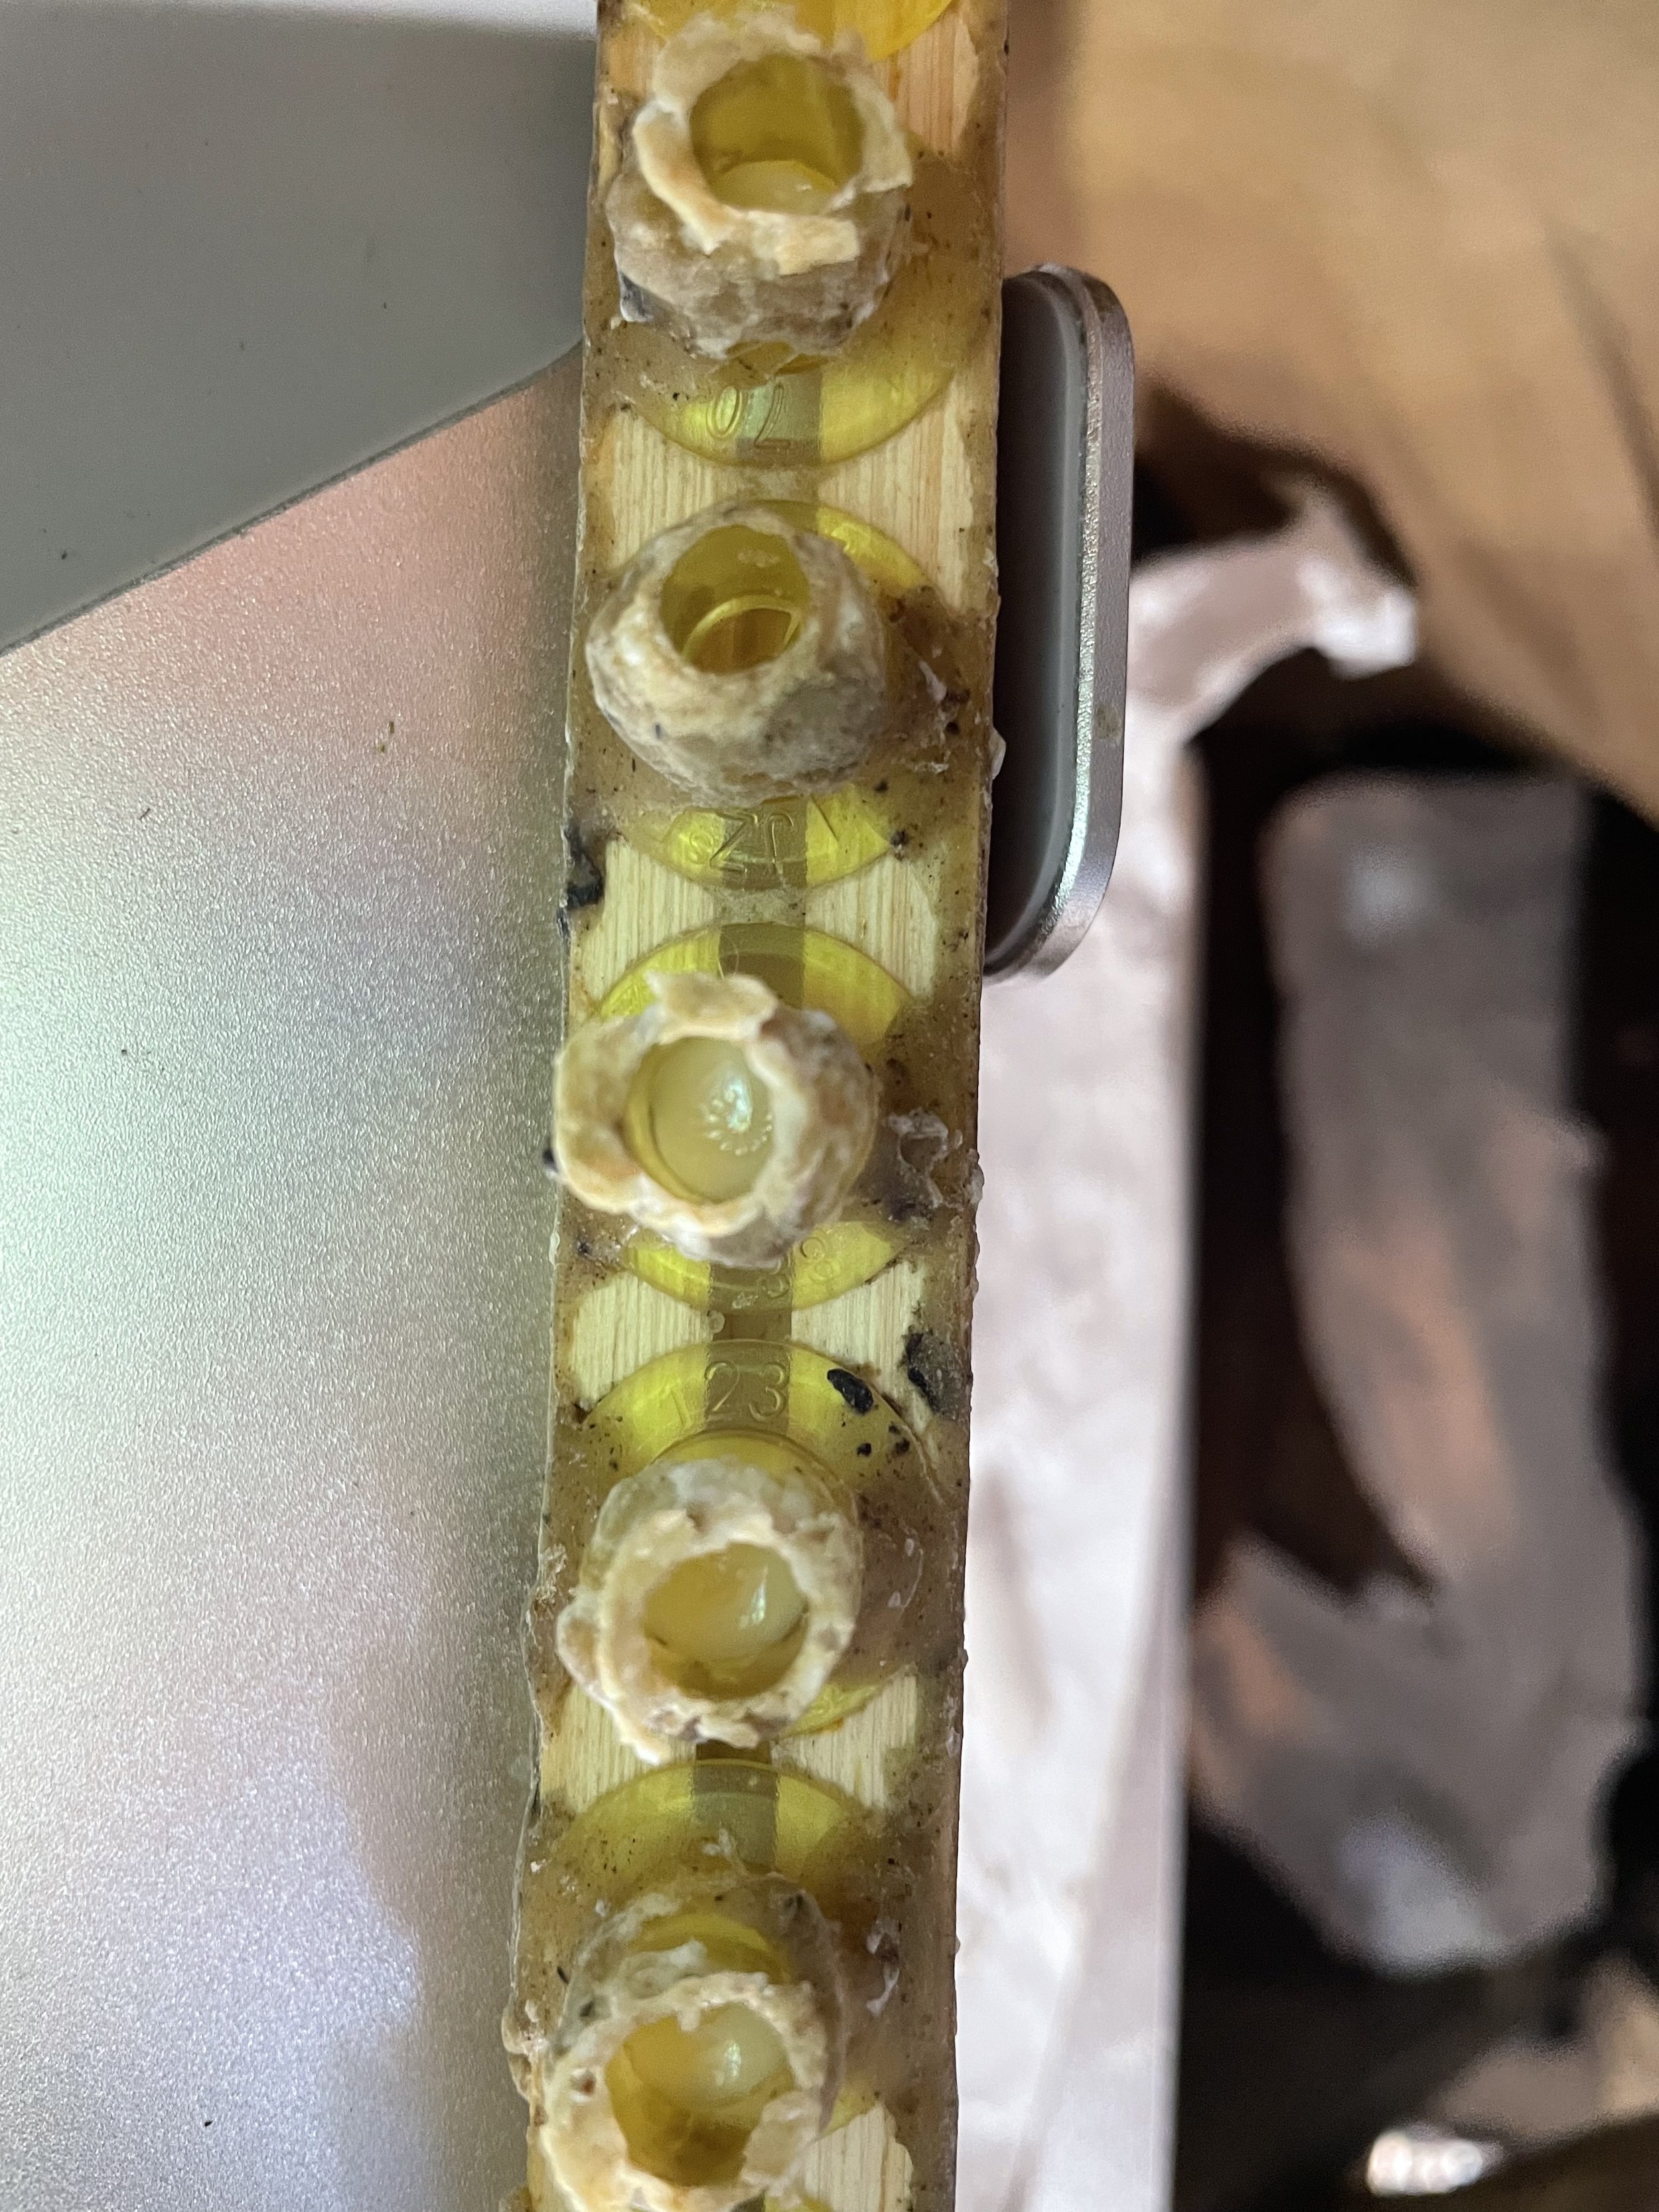
I'm also seeing hives with Deformed Wing Virus and chewed brood, a sure sign of mites. This is the case especially in the larger colonies. Why so bad this year? Because it was so warm this winter, many hives never stopped raising brood, and mites reproduce in bee brood. Pay close attention for hives exhibiting hygienic behavior, the most common indication is being able to see the tiny white faces of bee pupae looking out at you from inside the capped cells. The leading theory behind this behaviour is that some bees smell varroa and will uncap those infected pupae, thus reducing moisture and preventing the mites from reproducing but not harming the pupae inside. 

“bald Brood” is an indication of mites and hygienic behaviour

It's a good time to plan your mite treatments now. Once, a long time ago when varroa and its associated pathogens weren't as bad as they have become today, we wouldn't necessarily worry so much about varroa treatments. The idea was that the hives would outgrow varroa in the spring. But with the prevalence of viruses like Deformed Wing Virus (with 3 known strains!) it has become more difficult for sick hives to recover from a high mite load when their populations are low. There are more than 20 known viruses that benefit and are spread by varroa, and they continue to evolve at a rapid rate. 

Healthy, well-fed frame of capped brood.

On a side note:

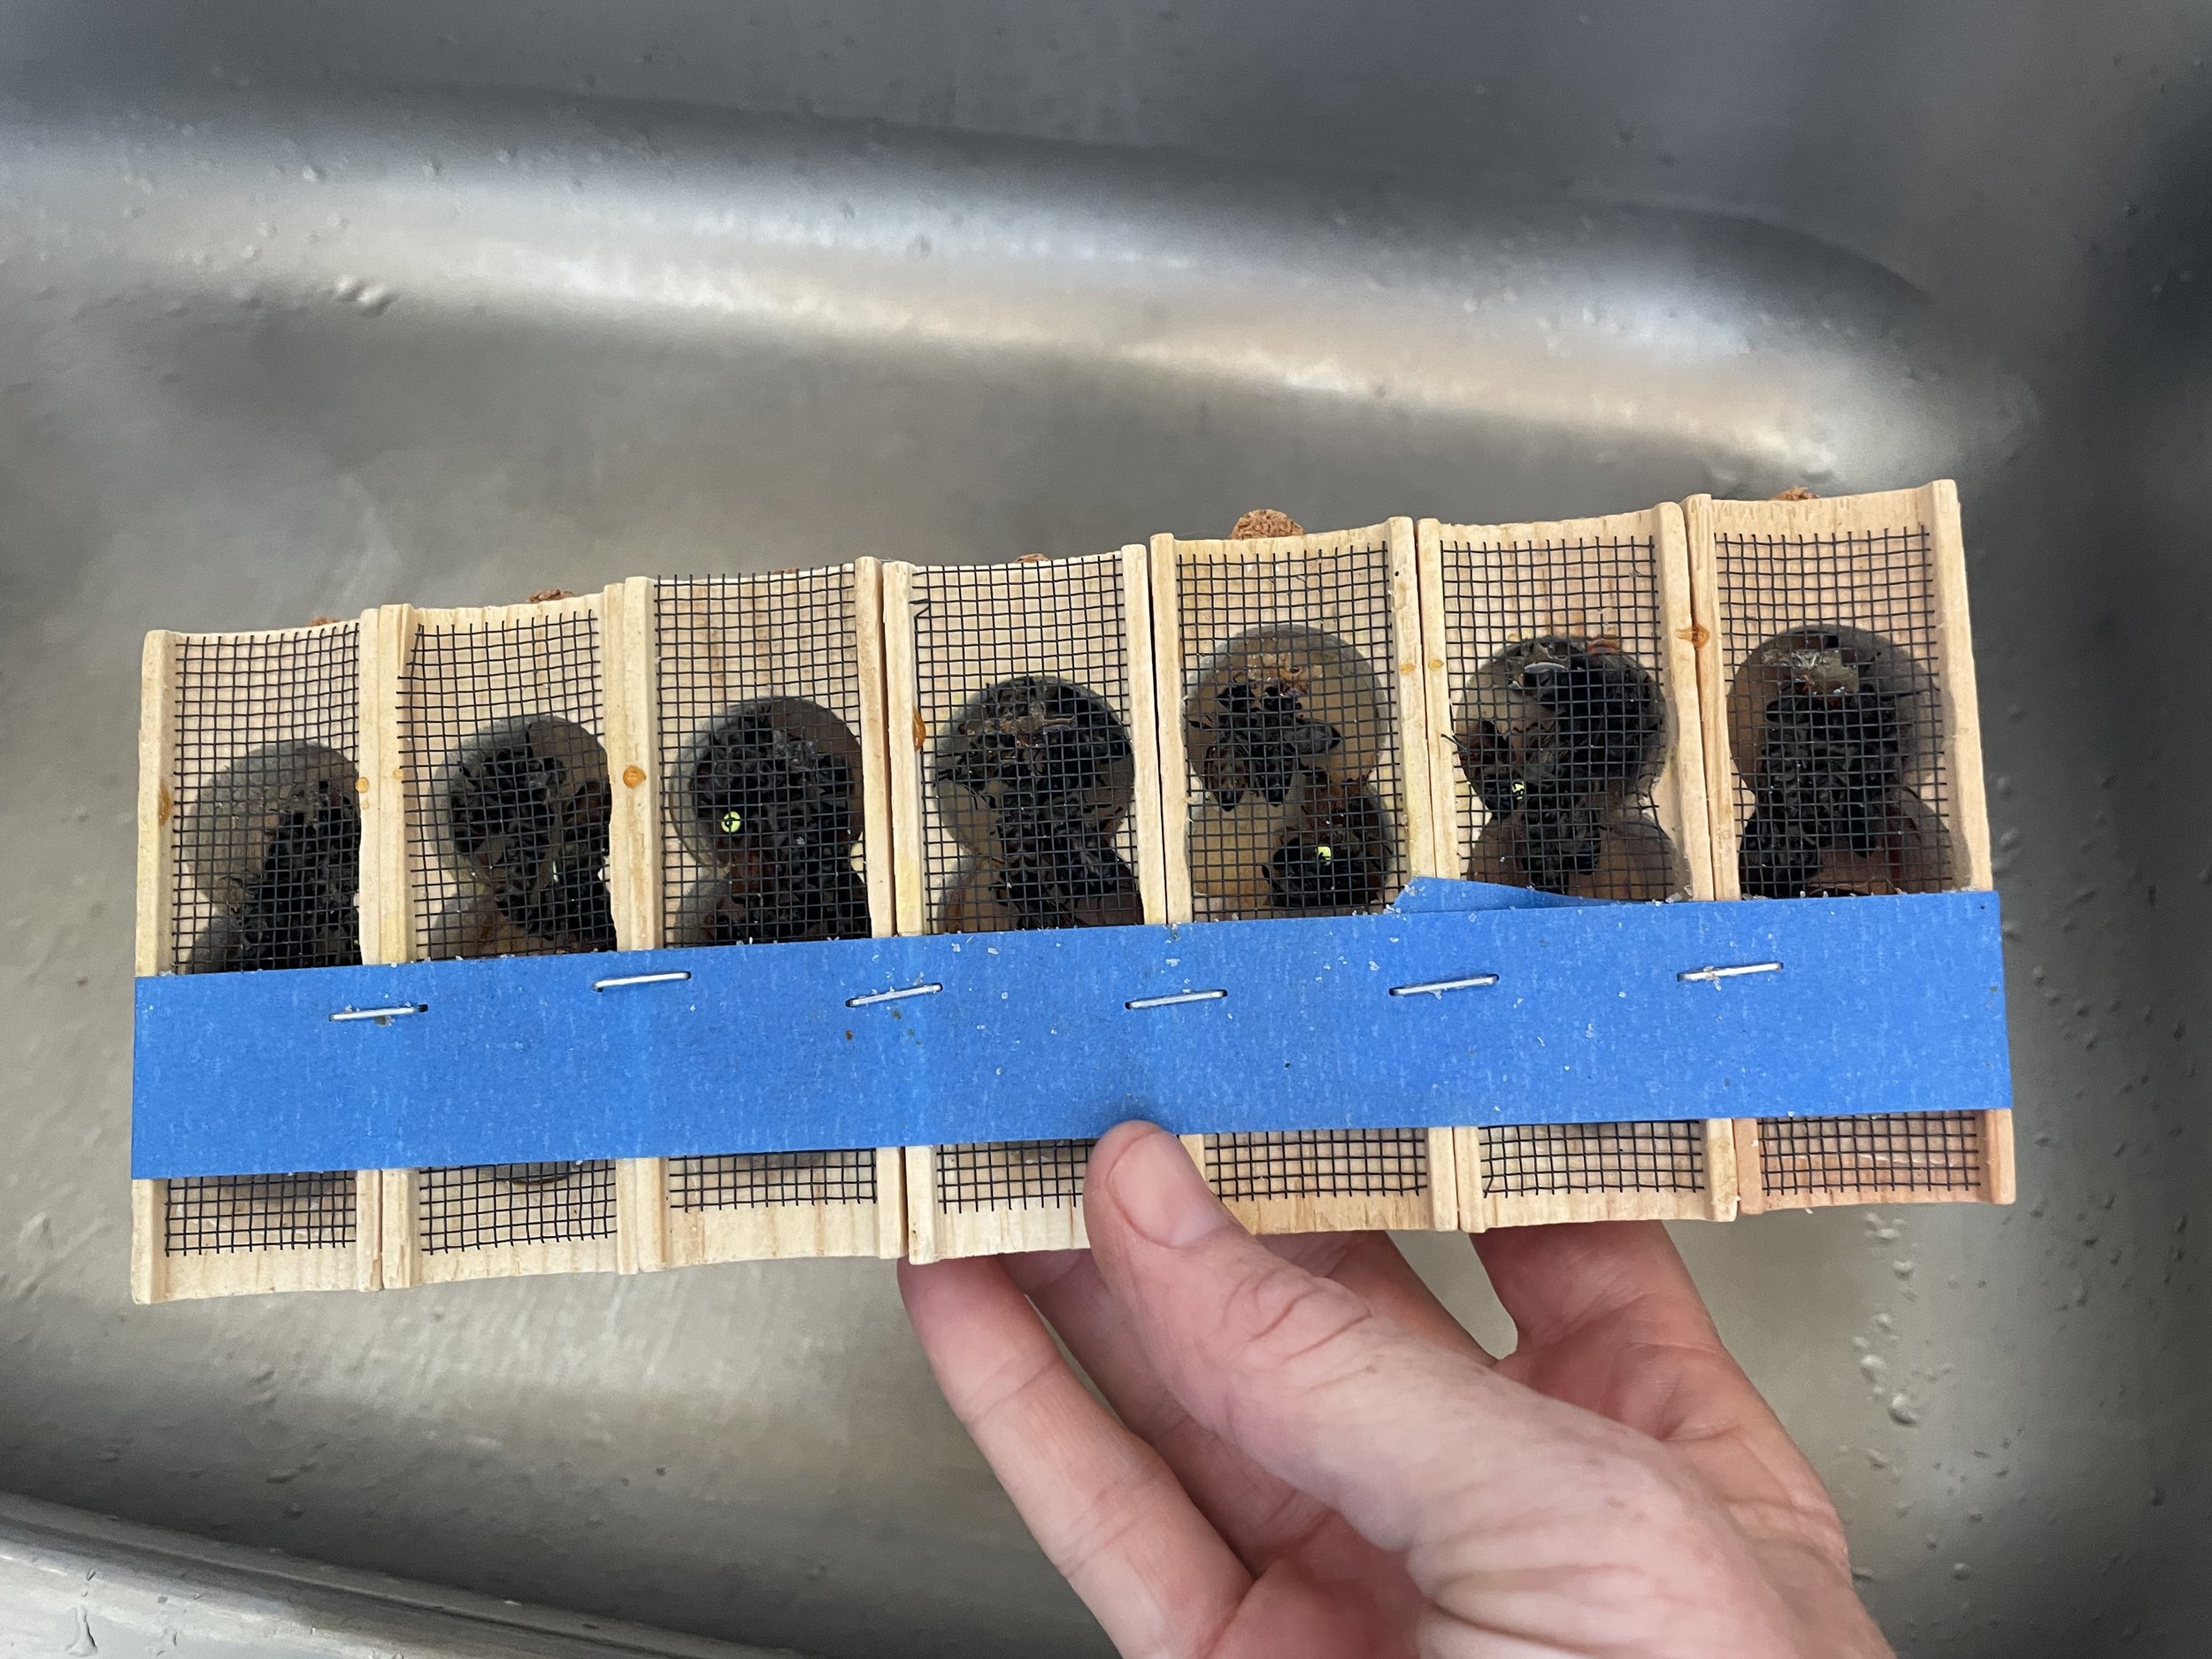
I had a few hives that were queenless or broodless when I opened them, but winter bees live a long time and their populations are often quite stable.  Those hives get a frame full of eggs, larvae and nurse bees donated from a strong colony. If the colony is strong enough, they can produce queens from 1-day old larvae. It's a bit early for queens to mate successfully, but if the weather holds steady the hives might have a shot at recovering. It is for this reason that I always double up on my hives, so that one can borrow eggs from the other when it is queenless. The same works for resources. 

Instrumental Insemination of Queens

After I’d been raising and selling queens for over a decade, I started learning to instrumentally inseminate queens.

While in Washington to train with Sue Cobey I got to see how she and the team at Washington State operate their breeding program. This is Sue at work on a batch of breeders that were inseminated with semen the team collected on a trip to Eastern Europe in 2014.

Steve Sheppard from Washington State is pulling the capillary tubes of semen from the cryo tank. Steve has been an integral part of the team for breeding the New World Carneolans, and had I not been so caught up in the process I’d have been better at asking his official role in this work so I could accurately report it later. I was too thrilled to see semen collected form all over the world and stored for so many years. It was like being a part of the legacy of bee breeding in the US, if only to witness. I’m holding a tube from Turkey, collected in June of 2014.

Sue sent me a few of the queens I inseminated while in Washington to place into my own breeding program. The queens were raised by Megan Mahoney and sent to Sue, and were really only intended for practice. But a few were really pretty, and we couldn’t bear to dissect them all, so they found a new home in my apiary at Woolly Egg Ranch.

I’ve been grafting from the inseminated queens Sue sent me, and have produced four batches of Black queens from her daughters.

Back in the lab for the work of insemination. These next few shots of me in the lab were taken by Kristine Erving, master beekeeper in training, who I’ve been mentoring.

Anyone who has inseminated queens will tell you that the real work is in the drones. Here I’m collecting semen from a mature drones. Yes, they have a large endophallus.

Once enough semen has been collected, its time to inseminate. The queens are anaesthetized with CO2 during the process. Insemination replaces the queen’s need to take several risky mating flights with one single event, and ensures that she will mate only with drones from desirable genetic stock.

Once the queens have been inseminated, they are returned to their colonies. When the procedure is done well, inseminated queens can lead productive colonies for many years.

Spring 2022 Update

This year we’ve selected for our breeders New World Carniolan stock. These hives have successfully overwintered for two years and show good temperament, honey production and haven’t been inundated with mites or pathogens.

We had a mild winter, and so were able to keep the mating boxes stocked with bees. This means that our queens will go into mating boxes that are ready to go, with plenty of nurse bees, brood comb and resources.

The first batch of queens went into production the last week of February, and will be ready to move into nucs by the end of March. Once they’ve settled and are laying well, we’ll start distributing 2022 nucs.

We use this larger style of double mating boxes for early in the season, since the larger size helps keep the bees warm on those nights when the temperatures are still dropping close to freezing.

Inspecting Hives during Unpredictable Weather

After three beautiful weeks of warm weather and happy bees, February brought cooler weather and rain. Lots of rain. My travels take me through several counties, and despite the rain, spring has begun nearly everywhere. In places with lots of concrete, the acacias and plums have started to bloom, and in a few wetland areas I see the teasing of swelled willow, poplar and alder buds. Eucs have been blooming for at least a week in most places, if not a month or more, depending on where your apiaries are. 

I rushed around in January getting supers on all of my strong colonies, and have not been disappointed in the resulting nectar flows. Looks like I’m on track with last year to harvest honey and begin populating my mating boxes the last week of February.
Unpredictable weather can make it challenging to properly inspect hives this time of year.  

Despite the weather, most hives are beginning to increase rapidly and may reach conditions where intervention could make a big difference in their well-being. Starvation can be a real problem for hives that may have grown so big in our January heat wave that a cold wet February could spell disaster for all those hungry mouths to feed. On the other hand, if you live near plants that begin blooming in January such as eucalyptus and acacia, by the time February arrives and the fruit trees and willows begin, you may soon find your hives are beginning preparations for swarming. 

If the weather isn’t conducive to pulling frames for a full inspection, you can do an abbreviated inspection that can tell you most of what you need to know this time of year. Do this with hives that have a lot of activity around the entrance, especially when you see those looping orientation flights from new bees just learning to fly and navigate. Those orientation flights are a sure sign of population increase, and they’ll benefit from a quick spring inspection. Crack the seal between brood boxes and tilt the top brood box back to check the bottom edge of the comb for queen cells. Should you see even one, you know it’s time to do a proper inspection on the next warm day, and that it’s a matter of hours or days before the hive swarms. If you don’t see any swarm cells, then you’re good to go for another week or two. With the hive tilted this way, you can gently separate the combs like pages of a book to peak up into them and get a sense of colony strength. If all the combs are fully covered in bees and with capped brood and/or resources, it’s time to add more room. This inspection should take about 5-7 minutes total, with no need to open the top cover or expose frames to the cold. 

Once you’ve determined swarm conditions and whether you need to add another box or not, note the weight of the boxes. If it feels like the hive has less than about 30 pounds of honey, (approx 1 full medium super), and the weather will be wet and cold, then it might be time to feed. 

The best emergency food for bees this time of year is drivert sugar added to the top under the inner cover. Bees will ignore it if there is a nectar flow, ensuring the sugar won’t mix into your honey supply. The dry drivert will act as a desiccant to wick away moisture in the top of the hive.  

You might wonder why I didn’t suggest feeding the hive with a frame of honey from another hive. This is deliberate: sharing honey between hives is a risky business that will spread American Foulbrood (AFB) and other diseases. If you’ve never seen AFB in person, then don’t risk it- always feed sugar or syrup to be on the safe side. 


Unique Methods for a Unique Climate: Winter Nectar Flow

California is a place like no other, and as a result, beekeeping here is different than anywhere else in the world. For many regions our biggest crop of honey can be found in the plants that bloom from November to March. Most hives in January begin with one brood box and a top box with stored honey. Several major sources of pollen become available during the last week or two of January, including acacia, eucalyptus and willows. Pollen stimulates brood rearing, and once it’s on the hive will expand brood rearing to accommodate that newly available protein source. Hives will double in population and then double again as more blooming plants come online, including mustard, plum and other fruit trees and early blooming ornamentals. It's important to stay on top of this growth and add room as needed. 

You’ll hear this term “adding room” as an important step in preventing hives from early swarming. Swarm behavior is complex and nuanced, but you can help reduce this tendency by “adding room” so that the queen has plenty of space to lay and the bees have open comb to fill with resources without needing to plug out the brood areas. 

Brood comb is being backfilled with nectar in this frame from Jan 17, 2021

Brood comb is being backfilled with nectar in this frame from Jan 17, 2021

Here’s some important information to remember. You will not accomplish “adding room” to a hive by adding a super of undrawn frames. “Room” only applies to drawn comb. Something else to keep in mind is that queens rarely cross undrawn frames or comb with capped honey because they’re only interested in egg laying. This means that adding a box of undrawn frames between the brood box and the honey super doesn’t accomplish anything but cutting the queen’s laying space in half, possibly crowding the hive even more. It also means that adding a box of drawn empty combs above a box of capped honey may not alleviate crowding if your queen never makes it past the capped honey combs into those empty combs where she can lay.

So what do you do if, like so many folks, you don’t have enough empty drawn comb this time of year? You have a few options. Extra honey does nothing for a hive, so harvest any amount above 30 pounds and add those empty combs back into the brood chamber. The absolute best solution for alleviating crowding is to drop a box of drawn combs between the brood box and the first honey super above it.  The queen will move up and begin laying right away. If you don’t have enough comb for a full super, add what you have to the center and place your undrawn combs to the edges. The queen will move up and the bees will draw the outer combs around the brood as they expand. 

Healthy Brood comb with Resources, October 2020

Healthy Brood comb with Resources, October 2020

Drawn comb is a bottleneck for most new beekeepers starting out, and adding to your inventory of comb should be one of your main beekeeping goals no matter how many hives you have. But what do you do when your hive has just seen its first winter and you have no extra comb at all? One way to ensure that bees can expand without chilling them is to add your undrawn combs below the brood chamber. The term beekeepers use when you add a box to the bottom this way is called “Nadir” which in this case simply means “Below” a particular point- in the way that “Super” means being above. 

It's not foolproof to nadir, especially if you are still using screened bottom boards. (I got rid of my screened bottom boards years ago). But nadir is worth trying due to the low risk it poses, and in the chance bees will often continue to draw in those bottom boxes with comb, giving the brood area more room. 

Just remember, undrawn frames, even with foundation, don’t count as room. 

One new option for adding to your comb inventory made its introduction in 2020. Bettercomb by Betterbee is an artificial comb made of paraffin that may be the perfect solution to alleviate your comb bottleneck, but you have to promise me you don’t mix the paraffin with real beeswax, which would be a disaster on many levels. 

Image capture Bettercomb from BetterBee website

Image capture Bettercomb from BetterBee website


Making it Fancy at the Woolly Egg Ranch

IMG_8036.JPG

Ken teased me one day while we were out working, calling me “fancy”, and its a joke we’ve run with the last few months as we build new fences, hives stands and equipment. But seriously, I’m gearing up for when we can reopen to the public for workshops and classes, and I’ve been focusing on improving visitor experience and to improve my own work flows when tending the hives.

The fences keep the sheep from rubbing against the hives and accidentally knocking them over. Ken and I spent some time planning on how we can also make them functional. Newly built fences will make it easier for people to lean over and watch demonstrations, and we call this area “The Observation Deck”.

The Observation deck, where visitors can lean over and watch demonstrations.

The Observation deck, where visitors can lean over and watch demonstrations.

With the new and improved fence, I can stack equipment on the middle and top rails, hang my hive smoker, and the bees can fly through the slats without any trouble. This replaced a T stake and chain-link enclosure that was built to enclose a veggie garden. The garden has since moved down the hill, and when I first came to toe property there was one lonely beehive here. Now there are 7 hive stands and 10 posts for mating boxes!

The work on the Garden Apiary with the Observation Deck was completed in May. Then we set to work on the Walnut Apiary, where I graft my queens. Judith kept being stung on her way to collect eggs every evening any time I inspected hives in the Lemon Apiary, so I decided its time to move those hives to a more remote location. We had a look at the Walnut Apiary and decided to expand it from 4 hives to a dozen to take in the Lemon hives.


The Walnut APiary in the Demo phase. Very Not fancy.

The Walnut APiary in the Demo phase. Very Not fancy.


I don’t have many photos of the Walnut apiary before we started the work, but here is one the first day we began. I’ve started to pull the chainlink fence off, and Ken’s moved the first few eucalyptus rounds in to make the ground more level. The tubs will go below the eucalyptus and we’ll grow potatoes or herbs in them.

Posts have been set and soils added

Posts have been set and soils added

I had a few days of looking at this before we could set aside the time to hang the rails. The day we were to meet again for the rails, I found myself standing on top fretting that it still wasn’t quite enough room for the number of hives I wanted here. I kept thinking that the soil will surely settle and I will need to keep leveling any hive stands that are placed here. And then it occurred to me that there isn’t really a need for sheep fencing here, since the rounds are about 22-24 inches tall and the adult sheep are too big and heavy to go climbing up to rub on my hives. So Ken and I had a meeting and agreed that using a hive stand to enclose the area would solve all of my problems at once.

I won’t lie, Ken did most of the work and I was his assistant. He has the patience of a saint, and if the rail wasn’t perfectly level the first time, we redid it until it was.

Ken setting the lag bolts to tie it all together

Ken setting the lag bolts to tie it all together

Ken loads soil to level the yard

Ken loads soil to level the yard

Making sure the rails are level. Ken really puts himself into his work, pun intended.

Making sure the rails are level. Ken really puts himself into his work, pun intended.

I snapped all of these shots when he wasn’t looking and I didn’t need to hand him a tool or hold any rails. Needless to say, I’m really excited about the improvements!

The walnut apiary

The walnut apiary


Here is the last shot of the day before we signed off and joined Judith under the apple tree for cider. Beyond the fog is a view of Mt. Tam across Tam Junction and Tennessee Valley. I have a great view from here! This will be my main area for raising queens for next summer, and with the new stands I can set up enough hives to raise up to 200 queen cells at a time. From there the cells will be moved to one of my mating boxes at bee yards in Marin.

Below the apiary is my truck, and beyond that you can see a few of the coops for the egg part of the Woolly Egg Ranch. The Ranch is a super cool place for me to have my home base, and Ken and Judith’s values overlap really well with my own. The coops are constructed mostly of salvage from Ken’s community of contractors, and as you can see, if there isn’t solar on a rooftop then there is greywater catchment for use in the orchard. In the background to the right you can see a big pile of logs that were harvested during summer fire maintenance on the property, and they’ll sell some and burn the rest in state of the art wood stoves designed to burn clean with little carbon waste expelled into the air. Over the last two years we’ve been working on improving the soil to reduce erosion, though right now you can’t tell because the chickens eat everything green and love their dust baths. You can see a few chickens in the lower right hand corner of the photo as they make their way to their favorite spot next to my truck. Over the next few months I’ll be working in this area below my apiary to make it green again so that when the spring rains come we don’t lose any topsoil to erosion.


Making nucleus colonies for new hives

Hives at Front Porch Farm in Healdsburg have just finished pollinating the plums and are ready for peaches and apples.

Hives at Front Porch Farm in Healdsburg have just finished pollinating the plums and are ready for peaches and apples.

Its been a busy spring here in Northern California, where my first nectar flow began the last week of January when the plums began to open their white and pink buds. With the fresh nectar and plenty of pollen from the willows, acacias and bays, my hives are all thriving. Last week I worked up in Healdsburg at the Front Porch Farm, a sweet farm nestled in a valley with the Russian River as its north east border.

I’ve been busy managing my colonies for spring to prevent swarming. I’ve also been raising the next batches of spring queens to split my colonies the last week of March. I’ll use these colonies to add to my own apiaries and will sell the extra nucs to my hobbyist clients. It feels good to know that I can be a part of resilience for myself and my community by supporting farms and producing products for local markets.

I’ve had the most productive spring, with the production hives in some of my locations having such a strong nectar flow that they’re building new comb and capping the entire super in a week to 10 days. That’s a rate of about 50 pounds of honey per week, and it lasted three weeks before the weather changed and things got back to a normal spring cycle for the area. I spend most days outside, in the sun, a smile on my face and surrounded by bees. It just doesn’t get any better than that.

We’ve harvested four supers of honey, and four deeps of bees and brood from these colonies in 2 weeks.

We’ve harvested four supers of honey, and four deeps of bees and brood from these colonies in 2 weeks.

Not only am I harvesting honey at a much faster rate than ever before, but I’ve been building up big healthy colonies to raise the next season’s young queens. I’m set to have a bumper crop of starter colonies for sale. But first, I need to raise more queens.

How do I raise queens? In a nutshell, when a hive is queenless, they automatically shift their focus to produce queen cells. Lots of them, and whichever queen hatches out first kills the other queens and gets to be the new queen of the hive. I use this natural tendency to raise many queens, with larvae selected from my best hives, and rather than letting the first one win, I let every queen hatch in her own small mating box with her own retinue of bees. The mating boxes are small- about 1/8 the size of a normal hive- just big enough to support a young queen while she hatches and goes out on her mating flights. Each box has a different color and so do the lids, so queens can recognize their own hives and not accidentally show up at the wrong door.

Prepping mating boxes

Prepping mating boxes

Each mating box has 4 mini frames, a cup or two of bees, plus a queen cell to get started. Here I have the boxes set out, ready to receive bees.

Mating boxes at my apiary on Quail Ridge.

Mating boxes at my apiary on Quail Ridge.

The queen hatches in her mating box and spends about a week getting ready to fly. Once she’s ready, she may seek mates for several days and may mate with as many as 20 drones. Then she settles down and spends the rest of her time laying eggs and being tended by her daughters. These hives are from two batches a week apart, with a total of 38 queens. In the foreground is the swarm box and a cup I use to add bees to hives that are a little skinny.

How do I make so many queen cells?

I graft queens from the larvae of my best colonies, those that are gentle, produce lots of honey, and demonstrate resistance or tolerance for varroa mites and their associated pathogens. Each 1-day old larvae is gently scooped out of normal worker brood comb and placed in an artificial queen cup. Those artificial queen cups are added into a hive that is queenless and filled with nurse bees eager to have a job to do.

Grafting larvae. On a side note, 1 day old larvae are too small for my camera to capture, so this is actually too old for a good graft!

Grafting larvae. On a side note, 1 day old larvae are too small for my camera to capture, so this is actually too old for a good graft!

QUeen cells are tended by nurse bees, who feed each QUeen Larvae 160 times a day

QUeen cells are tended by nurse bees, who feed each QUeen Larvae 160 times a day

Some queens hatch out in an incubator, which allows me to evaluate each queen for fitness before she goes into a mating box

Some queens hatch out in an incubator, which allows me to evaluate each queen for fitness before she goes into a mating box

You can see from the image above that each queen cell starts from a plastic cup and looks like a peanut when its ready to hatch. This is basically a cocoon, complete with spun silk. This method of grafting queens allows me to save every queen instead of letting the one who hatches first win out over the others. In the incubator without bees, the queens won’t kill one another. This gives me time to evaluate each queen and to make only the number of mating boxes I need for the queens who make the cut.

2020 QUeens will have a blue dot on their backs to identify their age and make them easier to spot

2020 QUeens will have a blue dot on their backs to identify their age and make them easier to spot

nuc colony.jpg

Once queens have started laying, they will be moved into nucleus colonies with full-sized frames. This is a 5-frame medium nuc, with 2 nucs in one hive box, divided in the center. This method allows the nucleus colonies to stay nice and warm, sharing heat between the two halves. While queens are in the double-nucs I evaluate each, checking out how well they are laying, before sending them out to start new hives.

Each nuc is transported in a cardboard nuc box to its new home.

Each nuc is transported in a cardboard nuc box to its new home.

Gearing up for Spring

Winter is the time of year when beekeepers like me take to the wood shop for building the next season’s equipment, because once spring gets underway there’s no time for anything but working hives.

Last year I spent several months designing, building and painting mating boxes to expand the queen rearing side of my business.

A mix of queen castles and minis.

A mix of queen castles and minis.

For many years I’d been using nuc boxes and queen castles for mating boxes. In the image above, the queen castles are the white boxes in the top center. Basically, a queen castle is a modified hive body that divides into three or four sections so that multiple queens can be raised in each box. This method has its advantages, in that you can use standard frames to maximize queen rearing capabilities using fewer resources. The problem is that its hard to keep just two frames thermo-regulated properly, so when it gets cold, the bees can have a tough time.

Mini mating nucs. These boxes sit on top of standard hive boxes so you can “grow” your frames prior to moving them to their own stands. The shape allows for better thermo-regulation by nurse bees.

Mini mating nucs. These boxes sit on top of standard hive boxes so you can “grow” your frames prior to moving them to their own stands. The shape allows for better thermo-regulation by nurse bees.

Last year I decided to make the investment into mini mating nucs. I’d tried a few the year before and found them to be less resource intense than standard nucs because they occupy essentially one quarter of the space than a regular nuc, but the shape allows for better thermo-regulation by the nurse bees. Above are my test boxes from 2017 sitting on top of standard hive equipment.

Ordered chaos as I receive shipments, make modifications and build equipment.

Ordered chaos as I receive shipments, make modifications and build equipment.

First round of minis have been painted, only 40 more to go…

First round of minis have been painted, only 40 more to go…

Next door is a shop full of young hipster dudes volunteering to make the rigging for a wooden-mast sailing ship called the Matthew Turner, which was built in the old ship yards at Liberty Ship in Sausalito. Every day I’m out painting, guys walk by and ask what I’m doing. They think its cute, all these bright colors, like I’m painting dollhouses or something. Sometimes I have the patience to explain that queens see in a color range from orangey-red to ultraviolet, and that the colors help them orient so they return to the right hive after their mating flights. Other times I use the respirator and my headphones as an excuse to ignore them so I can get some work done. #notheretomakeyourlunch

Hinged lids and center dividers so that each box gets two nucs with their own queen.

Hinged lids and center dividers so that each box gets two nucs with their own queen.

One of the ways to draw comb quickly- throw a swarm on top

One of the ways to draw comb quickly- throw a swarm on top

Ultimately the minis were a big success, and I was able to provide queens for all my nucs in 2018, plus sell plenty of queens to my local beekeeping community.

This week I’ll be back in the wood shop to make improvements to the mini lids so they are more weatherproof. The hinges were ok in concept, but not so much in principle. They leaked in heavy rains, and I think it might be better to have a double inner cover and solid telescoping. To be continued…

Smokey Days at Woolly Egg Ranch

Megan Livie upon arrival at Woolly Egg Ranch. In her hand is a California Sister Butterfly, and being a new transplant, it was the first Megan had ever seen.

Megan Livie upon arrival at Woolly Egg Ranch. In her hand is a California Sister Butterfly, and being a new transplant, it was the first Megan had ever seen.

Photographer and SFAI student Megan Livie visited my apiary at Woolly Egg Ranch during the Paradise Fire in November to take photos for a class project.

Megan had decided to focus her photo essay on bees for the class. In Megan’s words,

“I approached The Bee Project with curiosity and fear. The purpose of this project was to get over my fear of bees. When I was 13, I nearly died of an allergic reaction to a bee sting. I had been stung by bees prior to this, but I never reacted - this made the experience traumatic. Since then, I have gone through five years of desensitization shots (weekly or bi-weekly). There is a 90% chance that I am not allergic anymore, but I have not been stung since.”

When we arrived at the Ranch, the winds had been blowing smoke over the Bay area for a day or two, but we hadn’t yet seen the worst of it. The photo I have here of Megan is the last time I’d see her whole face, and we quickly donned our masks and set up the hill to the bees.

The following photos are from Megan’s project. You can find her own writing about the experience at her website, http://www.meganlivie.com/thebeeproject/

Jennifer lights her smoker at the top of the hill under the eucalyptus grove

Jennifer lights her smoker at the top of the hill under the eucalyptus grove

Jennifer’s sweetheart misses his creme brulee torch, but its the best way to light a smoker

Jennifer’s sweetheart misses his creme brulee torch, but its the best way to light a smoker

Photographers love to take photos of smoke

Photographers love to take photos of smoke

Mini mating nucs for raising queens

Mini mating nucs for raising queens

Jennifer opening hives in the mating yard

Jennifer opening hives in the mating yard

Jennifer shows Megan how this hive is not doing well s a result of varroa mite infestation

Jennifer shows Megan how this hive is not doing well s a result of varroa mite infestation

“Ok Megan, are you ready for this?” Jennifer shows off for the camera.

“Ok Megan, are you ready for this?” Jennifer shows off for the camera.

Jennifer takes a peek at a top bar hive before opening

Jennifer takes a peek at a top bar hive before opening

Top bar hive inspection

Top bar hive inspection

Getting creative- Normally Jennifer blows on bees to get them to move, but here she places her hand gently on top to get the bees to move

Getting creative- Normally Jennifer blows on bees to get them to move, but here she places her hand gently on top to get the bees to move

Eating lunch

Eating lunch

The best part about this project is seeing Megan’s work and reading her blog post. “By photographing bees, I have connected bees with beauty and peace. I can safely say that I am no longer afraid of bees. “